Sidewinder 174 build and season ride report

Turblue

Active VIP Member
Joined
Sep 15, 2008
Messages
1,360
Reaction score
4,128
Location
Southern Alberta
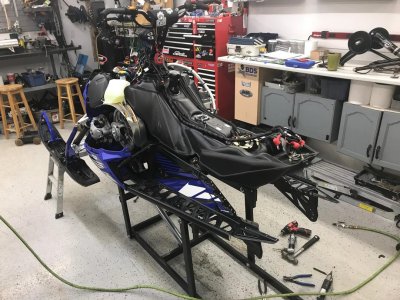
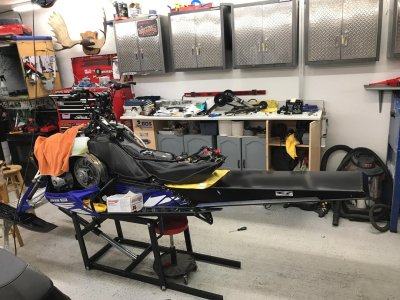
Just thought I’d start a post on my current Yamaha Sidewinder 174 build. Also probably keep the thread going through the winter on how the sled is working. Here’s a brief overview of what I’ve done this summer . Installed CR racing 174 tunnel extension, boards, and exhaust. I went with camoplast 174 9271m mostly because the deal was worth it...i figured worth a try......installed avid drivers. I kept the suspension in stock configuration for now. Iceage cut me a set of 174 rails...i am planning on going with different ski and rear skid shocks...currently working with a company in canada to get that figured. Also have wired in push button start and reconfigured the handlebar controls. More to follow....will post some details over the next few days.
 

Attachments

  • E63D04E5-7892-45A3-8E70-F592CB1B5476.jpg
    E63D04E5-7892-45A3-8E70-F592CB1B5476.jpg
    170 KB · Views: 1,395

Turblue

Active VIP Member
Joined
Sep 15, 2008
Messages
1,360
Reaction score
4,128
Location
Southern Alberta
Last year I only rode the sled a handful of times, including the demo ride....which sucked my right back to Yamaha. The sled worked so unbelievably well out of the box I was impressed. There were a few things, like always, I need to change to make it better for me riding style.


6FC72345-DC36-42D7-A509-A8992FCA265A.jpg

First off, I’ve always liked the feel of a 174” track, floatation, and traction.
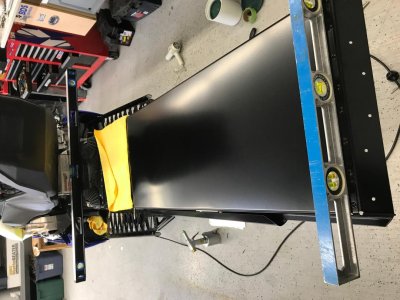
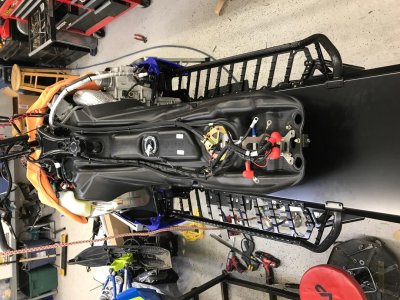
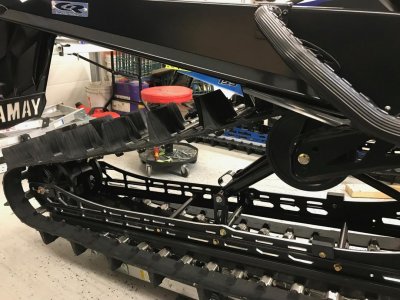
Chad at CR does an amazing job with the parts for these sleds...I installed the 174 extension and CR extreme boards. Install went pretty well....make sure to take the time and square up things to the sled prior to putting the rivets in. The new extreme boards should work well on the deep days. Boards have been one thing I haven’t liked about many of the sled manufacturers....better boards are a must.
B2DFFDD9-9627-4522-A275-930FB9201D3F.jpg
A32A0E20-EA67-4E12-8E06-6D7F60051507.jpg
22051B2E-13EE-44DC-B24C-43E525E4CFB7.jpg

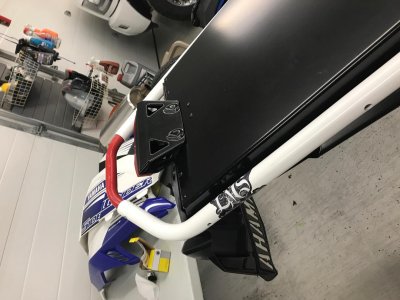
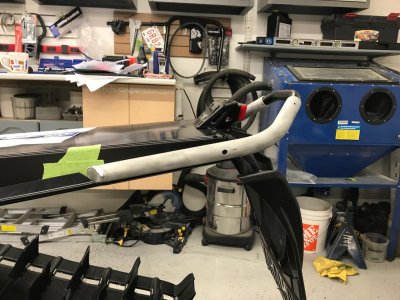
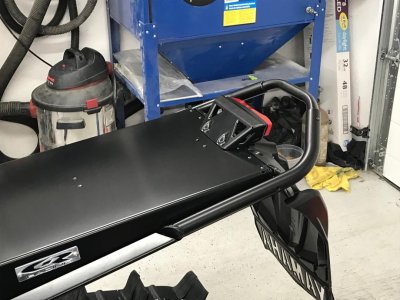
I then wanted a bumper that I can actually grab when buried in the snow. The LMS (Lethbridge Machine Shop) bumper looked like exactly what I was looking for. So I bought a used pro rmk one, cut it to a taper and welded the ends shut. Installed rivnuts to make it a clean install....it worked out pretty well.

FC6AA0D2-C115-4DEC-AE2E-05277044C019.jpg
654F802D-2EA2-4AE5-9481-559022FE58D2.jpg
2E011185-8075-48EA-A4C0-E1B7FD311667.jpg

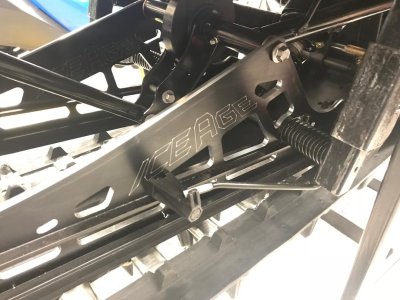
Since I really liked how the sled handles stock ...I wanted to keep it as close to stock with going to 174 rails. Iceage cut a sweet set of black 174 rails. I added skidoo scratchers since I tend to wreck the non reverse kind. Lol. As for shocks I have been working with John at Accelerated Technologies in Ontario. http://www.acceltechracing.com/
Im planning on going with Elka front ski shocks and rear skid shock. Elka doesn’t make a ski shock yet to fit the mtx ...so John is working with them to make a custom angled rezzy shock.
787E778D-3DF6-40D5-A77A-A9F68AB6C46D.jpg
B38A7A4B-4779-4673-B882-ADD7C28DB488.jpg

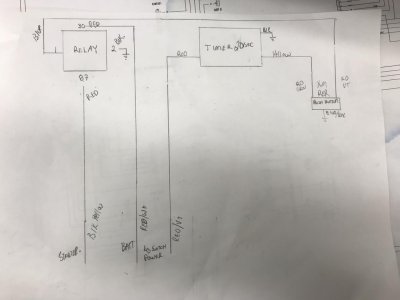
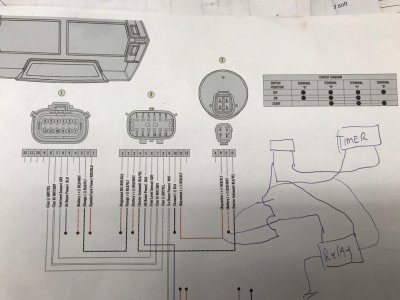
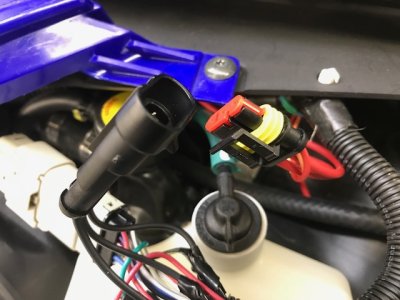
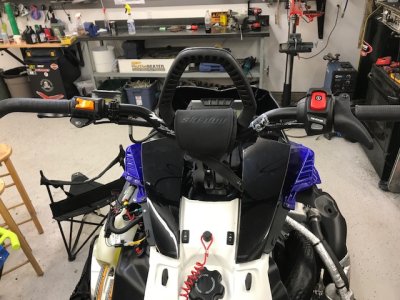
Steering/controls was a big part of the modification I wanted to do on this sled. I really like the idea of a push button start on the bars. Also clean up the controls and have a cleaner setup. I am pretty close to how I want them now, but not completely there. First off the brake and hand warmer switch block had to go. Coming off a skidoo xm I figured it made the most sense to go that route. So I installed a 2015 summit brake and rer/dimmer cluster. Wiring it in was relatively easy. I basically series/paralleled the key switch circuit . I added a mini hella waterproof really and a programmable timer relay to kill the power to the switch after it’s started. The main relay is there basically because I don’t think the rer contacts are rated very high. I set the timer for 20 seconds..so after the key is on, kill switch on and tether installed it kills power 20secs after. Power cycle resets it. Also taking the key out will still secure the sled...if you used a higher rated start switch you would only need the timer relay...here is the circuit. Disregard the scribbles on the key switch diagram I was thinking out loud. Lol.

D3413C2C-6661-47DD-9BC4-6F5E5C38BD18.jpg
FBA7CBB8-D3E4-4429-A42F-BC9B6CB81333.jpg
50C1966B-4CC3-4FCF-9A84-F1F5B7012403.jpeg

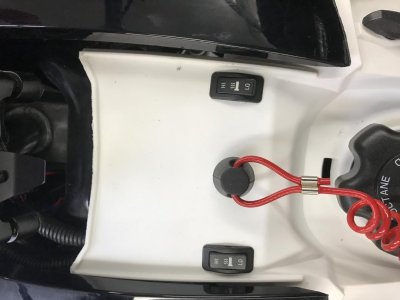
Now I needed to do something with the dimmer and hand warmer switches...dimmer pretty easy wiring to the rer dimmer switch. Hand/thumb warmers I wired to pro rmk switched in the console along with the tether. Worked out really well. I may try a Munster finger throttle if they start making one for the newer yammies, but not convinced yet. I am running CFR turcotte bars, skidoo adjustable riser and summit grab strap. I was running the CFR knucks risers prior but couldn’t make them work with the skidoo strap. I will mention in order to run a skidoo riser you need to grind the point of the tee post.... Not that bad though.


6DE07692-7B63-432F-AD3C-3F923578F0B9.jpeg
8AB4D4F9-3172-4B7E-A65A-3D55DD8B8423.jpg

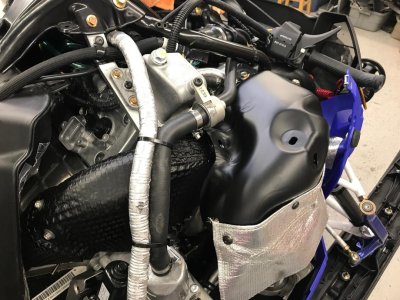
Motor wise I’m planning on running stock with a CR racing resonator exhaust. Possibly a cold air intake, but I have a couple things I might do intake wise. The stock Can is fairly heavy so it’s a easy weight savings. Also has easy access to the chaincase adjuster then. I powder coated my heat shields in high temp black. They don’t get that oxidized aluminum look then.
EF3ACE7A-B35B-4DCE-B6E3-933B699BD0BC.jpg

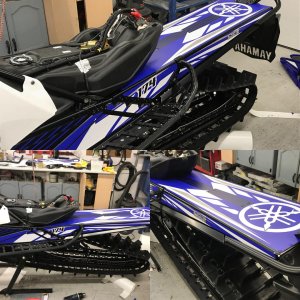
I was planning a cool wrap for the sled, but decided to just go with a Yamaha themed tunnel wrap for now from Marc at http://www.spiralusdesign.com. He did a great job on all my sled wraps...also if anyone needs a wrap for there 174 CR tunnel he will have the measurements now. We will probably have to tweak a bit after I get it, but after that should fit. I also have a few other cool things I’m working on...will post once I have them figured. All for now... any specific questions post them or pm me I more than happy to help out.
 
Last edited:

Turblue

Active VIP Member
Joined
Sep 15, 2008
Messages
1,360
Reaction score
4,128
Location
Southern Alberta
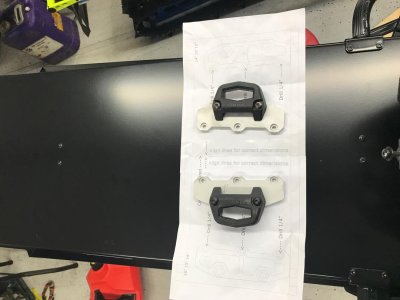
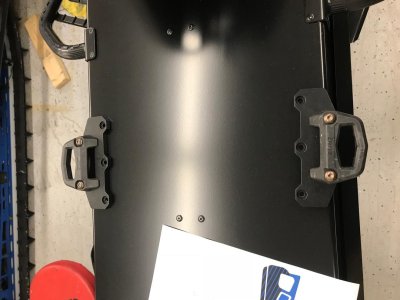
Kurt at Canadian sled parts http://www.canadasledparts.com has been working on a linq bracket system and platform design. I’ll be running the Polaris burandt bag and linq gas can same as I had in my summit. Here are a few pictures of the brackets
D18C5F80-C349-4422-A398-ECCC765138AF.jpg
2EA8140C-5A31-415D-82D6-B247FC6240C1.jpg
 

Attachments

  • 05EAFF7F-71D7-46E2-9F37-0602663EB46F.jpg
    05EAFF7F-71D7-46E2-9F37-0602663EB46F.jpg
    72.2 KB · Views: 1,279

Xmrider163

Active VIP Member
Joined
Dec 20, 2013
Messages
377
Reaction score
1,016
Location
Beaumont
Why are all the links broken on the pictures? Off topic but I want to see this build!
 

Turblue

Active VIP Member
Joined
Sep 15, 2008
Messages
1,360
Reaction score
4,128
Location
Southern Alberta
Can’t see the pictures? You many have your settings wrong ...anyone else have problems?
 

d mills

Active VIP Member
Joined
Nov 10, 2009
Messages
3,275
Reaction score
4,982
Location
camrose
I can’t see them on Tapatalk either. Lots of people having the same issue. Just seems to be on snow and mud. Can see all pictures on dootalk just fine.
 

Catrider16

Active member
Joined
Dec 9, 2016
Messages
65
Reaction score
195
Location
Kelowna
This is an awesome build, you and Lund will be some of the first to run these Yammies on 174. You guys sleds are almost copies other then color LOL, using the same aftermarket parts and all.
I almost went the same rout after seeing Lunds but opt to the new 18 Cat. But that was before seeing these builds, now I wonder if I made the right decision.
 

Turblue

Active VIP Member
Joined
Sep 15, 2008
Messages
1,360
Reaction score
4,128
Location
Southern Alberta
Thanks...I am a big CR Racing fan....I looked at some other options but hard to beat Chads craftsmanship and knowledge. I agree Lund’s build is spectacular.
 

catrutt

Active VIP Member
Joined
Jan 14, 2009
Messages
876
Reaction score
1,338
Location
okotoks
Don't you need to move the rear mount of the skid back it is on my xm 174
 

Turblue

Active VIP Member
Joined
Sep 15, 2008
Messages
1,360
Reaction score
4,128
Location
Southern Alberta
The rails are identical to factory so not sure why. Just longer. Moving it would change how the suspension works. Maybe if your running a different rear arm setup or something. I’ve always run stock holes on my 174” skids.
 

deaner

Active VIP Member
Joined
Nov 6, 2008
Messages
3,238
Reaction score
11,260
Location
Creston, BC
Have you had the hood/air intake assembly off? Just curious how heavy it is and if there would be much weight to save by going to a diamond s hood with the intake piped out.
 

Lund

Active VIP Member
Joined
May 4, 2013
Messages
4,247
Reaction score
11,290
Location
Vernon/Kelowna
Very, very nice Turblue. You must be itching to go for a rip? This has been a great platform to build from, i'm very excited on the out come of this sled, expect it to perform above expectations.
I guess i need to get back at it and finish mine off for the up coming season....LOL
 

Turblue

Active VIP Member
Joined
Sep 15, 2008
Messages
1,360
Reaction score
4,128
Location
Southern Alberta
Very, very nice Turblue. You must be itching to go for a rip? This has been a great platform to build from, i'm very excited on the out come of this sled, expect it to perform above expectations.
I guess i need to get back at it and finish mine off for the up coming season....LOL

I am kinda curious on how it will work. Lol ...and thanks for the advice this summer. Can’t wait to see yours all done.
 
Last edited:

162 Wizzy

Active VIP Member
Joined
Feb 11, 2007
Messages
186
Reaction score
50
Location
Whitecourt AB
I don't usually post too much but i couldn't help myself this time. That unit looks amazing. You have a talent Turblue. To the normal Joe it looks stock. I agree Chad @ CR is amazing but you should consider this as a career as well. Keep up the good clean work, i will be keeping my eye on this build for sure. Cheers
 

Turblue

Active VIP Member
Joined
Sep 15, 2008
Messages
1,360
Reaction score
4,128
Location
Southern Alberta
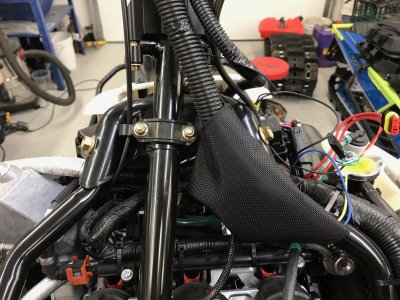
The pro rmk connector bags sure clean up the wire connectors....part # 2687067
A7158A6C-93A4-45FE-AC20-6BCF2EECCB54.jpg
 
Last edited:

Turblue

Active VIP Member
Joined
Sep 15, 2008
Messages
1,360
Reaction score
4,128
Location
Southern Alberta
Have you had the hood/air intake assembly off? Just curious how heavy it is and if there would be much weight to save by going to a diamond s hood with the intake piped out.
Using a decent bathroom scale...so take it for what it’s worth.... I measured myself and myself with the hood 3 times each and it was close to 17-18lbs every time. Seat is around 10-11lbs. Can is about 16-17lbs.
 
Last edited:
Top Bottom