Wall Jacking....What a P.I.T.A

lloydguy

Active VIP Member
Joined
Nov 29, 2010
Messages
889
Reaction score
1,499
Location
Lloydminster
So, what would you do ?upright's on either side of the window should be full length?
(floor to ceiling?)

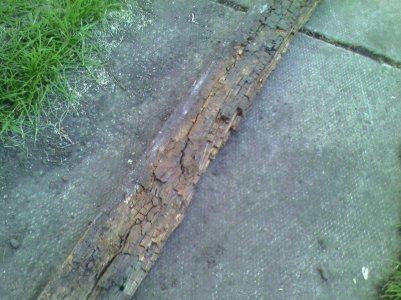
A lovely section of sil plate that was removed (cement side) From the top side it actually
looked in pretty good shape.
sil plate.jpg

I have another question.With repouring the cement pad in the near future NOT being
an option,and with the perimeter approx 3' being cracked and settled.What are my
options for leveling the building on an un-level pad? Using a tight string is a great tool
for making sure the walls are true from end to end,but I havent got my head around
using a string to find out where my low spots are.
Once I have the 4 wall's level(vertical) I think I want to shim the garage between the
cement and the sil-plate before I re cover the wall's,so when re-pouring a pad is possible
the building won't have to (flex) to sit on a level floor.
Thank's guys.
 
Last edited:

maxwell

Active VIP Member
Joined
Apr 25, 2007
Messages
20,078
Reaction score
43,156
Location
Sherwood Park, Alberta, Canada
If you plan to replace the pad you will have to jack the building again. Or we're you planning to pour a new Slab overtop? Might be the best bet since its not high enough above grade. Then again the fct that its cracked and unlevel tells me there's a problem with the sub base preparation and it should probly be rectified before pouring a new slab. There are self levelling cements you could use as a temporary measure. Do you have a floor drain though?
 

OVERKILL 19

Active VIP Member
Joined
Dec 22, 2006
Messages
3,420
Reaction score
1,933
Location
Red Deer
Not sure if this will work but just google window frame opening. You'll get the jist. But if you haven't had problems with it this far. Probably be fine leaving it. But could just add two studs and a couple cripples ..cheap!
 
Last edited:

X-it

Active VIP Member
Joined
Jan 8, 2007
Messages
7,748
Reaction score
17,699
Location
Prince George
No plywood on the walls either, a laser level is really cheap now 20 bucks and are pretty accurate. You could pour a 4 inch slab over everything and not have to lift the building however you would loose 4 inches in height. Pour those studs right in.
 

ferniesnow

I'm doo-ing it!
Joined
Dec 2, 2008
Messages
112,027
Reaction score
86,041
Location
beautiful, downtown Salmon Arm, BC
No plywood on the walls either, a laser level is really cheap now 20 bucks and are pretty accurate. You could pour a 4 inch slab over everything and not have to lift the building however you would loose 4 inches in height. Pour those studs right in.

I hope I don't sound like Cyle, but I wouldn't pour the studs right in! Do it right and follow the advice of Maxwell!

PS Those studs aren't treated and in a few years the same problem will occur. Rot will be rampant!
 

plio7

GBCA Member
Joined
May 5, 2009
Messages
9,789
Reaction score
10,011
Location
Calmer, formerly of the GBCA
when you let the strap off did it stay plumb?? my question would be what exactly moved to allow those walls to straiten. being the exterior sheething is still on your adjacent walls, they should not have been able to easily shift, and if they have there is going to be remaing lateral strain on the side walls that will eventually open up gaps in the corners where the walls meet. atleast I would guess. I may be wrong or misunderstanding the whole process just from my experience forcing a structure to move usually causes problems somewhere else.


Well, my little weeping tile project has gotten way out of hand.In the beginning that's the only mod.
I was going to do to the old garage.As I think I stated before, after I dug the trench for the weeping
tile I thought I might as well take a peek under the bottom row of vinyl to see what the X-90 looked
like underneath. Once I discovered the X 90 was 2-3" below grade and rotten I decided to cut off 8"
and replace that with a 6" strip of 3/8" plywood.Then I found the sill plate was rotten,bottom 6" of
drywall was rotten,mold in the bottom foot of insulation,wall's are WAY off of level,only 3/4 of the back
wall has vapor barrier on it,peg board was nailed directly to the stud's(every time you put a peg in the
peg board you poke more holes in the vapor barrier.
The list is endless.....................Talk about opening a can of worms.
O, well. I'll just quit crying about it and keep plugging along.

Outside wall w/trench dug for weeping tile,8" of x-90 cut off , gasket and new sill plate installed
View attachment 157503

Since the whole back wall was peg board and it was installed WAY wrong,I just decided to strip the wall
bare and start over.Front and rear wall's are also leaning about 1.5" to the east,so removing the peg board
from the back and the drywall from the front should "weaken" the wall's enough to be able to pull them straight
View attachment 157504
2" ratchet strap going from the bottom right corner to the top left.With a few hundred pounds
of force on the strap the wall is within 1/4" of being dead level.
 
Last edited:

X-it

Active VIP Member
Joined
Jan 8, 2007
Messages
7,748
Reaction score
17,699
Location
Prince George
Less air on wood less rot so that few years you are talking about is substantial if at all . His alternative is to lift the building, and pour a curb...not recommended in my opinion (no offence lloydguy i just could give you step by step what will happen with lack of experience). I have poured one way worse than this the studs where rotten off 4 inches on one end, and lots of rot everywhere else. Jacking it up about a foot and pouring the curb with the studs right in. That was 15 years back, no rot has occured since then. That guy was sure happy not to have to go through the effort and expense of tearing the building down. Of coarse even though the studs are poured right in does not mean you cannot cut them off with a sawall or chain saw and relift the building. His is not bad at all other than the crumbled concrete and bottom plates rotten
 
Last edited:

lloydguy

Active VIP Member
Joined
Nov 29, 2010
Messages
889
Reaction score
1,499
Location
Lloydminster
It is not easy to see in the 2'nd last pic. Pilo,but I do understand your question about how did I get the structure
to shift without removing anything from the outside wall's.The X-90 on the outside walls was put directly onto the
studs.This was done in approx 1974) X-90 is approx 12" tall and only has 1 nail in it (vertically) for every strip.
the bottom of every strip of X90 just rest's on the strip below it.So, once the horizontal strength was removed
from the inside of the wall's (pegboard and drywall) I thought the wall's should be easy to adjust.
Someone else said pouring ontop of the existing pad may not be a good idea,because it is settled and possibly
still moving around.You may be right ,but I think the shifting problems were IMO from the ground always being
saturated (grade around garage is too high and there was no drainage)
Weather I shim the structure level or temp.support it off of the existing pad and pour a grade beam around the
perimeter,I am still going to install weeping tile and a sump to get rid of the water issues.
 

X-it

Active VIP Member
Joined
Jan 8, 2007
Messages
7,748
Reaction score
17,699
Location
Prince George
Take care of the drainage, change the bottom plate and fasten them and you will be fine, plywood on the walls or strong winds will blow your house down. There are concrete products that allow skim pours and fancy durable concrete rollout products if you want pretty floors.

https://www.youtube.com/watch?v=nIEll-lmsQE
 
Last edited:

plio7

GBCA Member
Joined
May 5, 2009
Messages
9,789
Reaction score
10,011
Location
Calmer, formerly of the GBCA
oh for sure, weeping tile is a must for your situation. I would also consider running some peel and stick (blueskin) around the bottom 1' or so of your exterior walls just for a little added moisture protection. as for pouring a new slab. first thing I would do is go rent a good laser level. shoot in a mark on the wall somewhere and them shoot some of the higher and lower spots and record the info.....go out in the winter and shoot in the same spots. this will give you an idea if the subgrade is still heaving and moving on you. if it seems to be consistent then it may just have not been compacted properly and has now settled. if this is the case pouring a new slab over the top should work for you. I still don't agree with any toping mixes. working in commercial construction we have guys who use them all the time. and unless they are used on a good solid slab that isn't settling or heaving at all they will not last and will become expensive and frustrating

It is not easy to see in the 2'nd last pic. Pilo,but I do understand your question about how did I get the structure
to shift without removing anything from the outside wall's.The X-90 on the outside walls was put directly onto the
studs.This was done in approx 1974) X-90 is approx 12" tall and only has 1 nail in it (vertically) for every strip.
the bottom of every strip of X90 just rest's on the strip below it.So, once the horizontal strength was removed
from the inside of the wall's (pegboard and drywall) I thought the wall's should be easy to adjust.
Someone else said pouring ontop of the existing pad may not be a good idea,because it is settled and possibly
still moving around.You may be right ,but I think the shifting problems were IMO from the ground always being
saturated (grade around garage is too high and there was no drainage)
Weather I shim the structure level or temp.support it off of the existing pad and pour a grade beam around the
perimeter,I am still going to install weeping tile and a sump to get rid of the water issues.
 

lloydguy

Active VIP Member
Joined
Nov 29, 2010
Messages
889
Reaction score
1,499
Location
Lloydminster
3 of the 4 inside wall's were drywall,and the rear wall was peg board top to bottom.During my
humming and hawing stage I was going to just re-hang drywall where I have already opened the
wall's up and plywood the rear wall with pegboard on top of that for the upper 4'.Now that I have
the front and rear walls gutted on the inside and knowing that there is no sheeting on the outside
of any of the wall's,I think the smartest rout would be to put up 1/2" plywood where I have removed
drywall and pegboard.The sill plate is now done all the way around with pressure treated wood,so
instead of digging deeper into troubles.I think I'm just going to run a string line,jack and shim the wall's
where needed,tie it down in a few spots and start closing her back in.
I have 1 sheet of drywall down on the north to south wall's in each corner ( I wanted to see how well the
wall's were tied together ect)So,i will put 1/2" plywood there as well,That should strengthen the structure
back up good after I get the wall's all square and plum.

Plio what is this bluestick you mentioned?
What I was going to do is screw in a 6"strip of plywood where I cut the X-90 off of the exterior
,staple some vapor to the top of that and leave an extra foot hang down from there into the
weeping tile trench(to stop water from trench migrating under the cement pad)
Good idea or bad?
thank's
 
Last edited:

X-it

Active VIP Member
Joined
Jan 8, 2007
Messages
7,748
Reaction score
17,699
Location
Prince George
Ha ha i seen one guy with that peel and stick stuck all over his back and shirt...does that stuff stick in the warm weather it glue to your skin like you would not believe.
 
Top Bottom