Circled-Mistake
Active VIP Member
Hey guys and gals, Ijust thought Id share how i fixed my recoil on my 06 REV 800... Recently I rebuilt the recoil, used a new washer,etc... I then went on a trip ti Vale...3rd day my recoil flew apart right when the motor caught..... Pulling the little washer off of the stub inside the recoil housing and jamming it all up...
When I got home, I cleaned it up a bit, installed a new washer, installed on sled, same thing happened... I guess what happens after you remove the washer multiple times you end up wearing the plastic out that the washer locks to.... Nothing holds the washer there, then it just falls apart again...
I dont know if anyone else had tried this, but I decided instead of buying a new housing for big $$$, I'd put my mind to work and try to find a simpler way.... ENTER BRIGHT LIGHT!!!!!!!!!
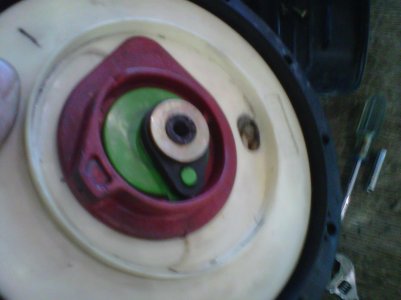
 Here you can see a 7/16 washer pressed onto the little stub on the recoil housing... Apparently a Grade 8 Flatwasher is a perfect snug fit onto the stub.... But i figured it would just fly off again, so I then decided that it wouldnt hurt to TAP the stub to 3/8" coarse thread
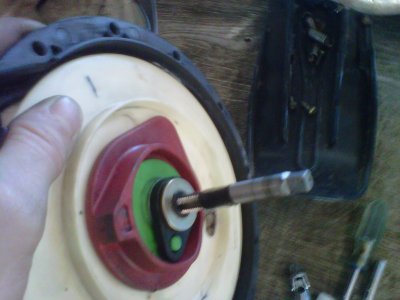
 You can TAP this stub to 1" deep, but any farther you risk popping out the other side..... Once it was tapped, I then used another 7/16 washer, installed on top of the original one..... Once that is done, all you need is a 3/8" Lock-washer and a 3/8"X1" Bolt..... I found just to be safe, I decided to Shave half of the thickness of the bolt-head off, just to make sure nothing was going to rub.... Used a little Loctite on the Bolt and VOILA!!!!!!!!!!
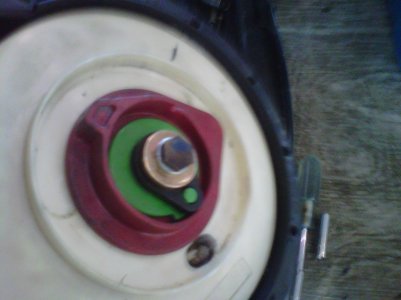
 Here's the end result!!!!!!!!!!!!!!!! As you can see, the bolts and washers fit quite well, and hold just the right amount of pressure to let the recoil function properly.... And hey, if this doesn't work.... At least I tried!!!!!!!! I pulled on er lots since the repair and all seems good!!!!!
Hope all can use this info....... CHEERS!!!!!!!!!!!!!!!!!!
Sorry if the pics are fuzzy, hope you get the jist of it....
When I got home, I cleaned it up a bit, installed a new washer, installed on sled, same thing happened... I guess what happens after you remove the washer multiple times you end up wearing the plastic out that the washer locks to.... Nothing holds the washer there, then it just falls apart again...
I dont know if anyone else had tried this, but I decided instead of buying a new housing for big $$$, I'd put my mind to work and try to find a simpler way.... ENTER BRIGHT LIGHT!!!!!!!!!
 Here you can see a 7/16 washer pressed onto the little stub on the recoil housing... Apparently a Grade 8 Flatwasher is a perfect snug fit onto the stub.... But i figured it would just fly off again, so I then decided that it wouldnt hurt to TAP the stub to 3/8" coarse thread
 You can TAP this stub to 1" deep, but any farther you risk popping out the other side..... Once it was tapped, I then used another 7/16 washer, installed on top of the original one..... Once that is done, all you need is a 3/8" Lock-washer and a 3/8"X1" Bolt..... I found just to be safe, I decided to Shave half of the thickness of the bolt-head off, just to make sure nothing was going to rub.... Used a little Loctite on the Bolt and VOILA!!!!!!!!!!
 Here's the end result!!!!!!!!!!!!!!!! As you can see, the bolts and washers fit quite well, and hold just the right amount of pressure to let the recoil function properly.... And hey, if this doesn't work.... At least I tried!!!!!!!! I pulled on er lots since the repair and all seems good!!!!!
Hope all can use this info....... CHEERS!!!!!!!!!!!!!!!!!!
Sorry if the pics are fuzzy, hope you get the jist of it....


